ajlloyd15
-
Posts
47 -
Joined
-
Last visited
About ajlloyd15
ajlloyd15's Achievements
7
Reputation
-
 all of this is AMAZING!! great job!!! I was wondering how you added the design and texture to the invitations and paper?
 -
Here is the template for the passports. I don't know why but I had such a hard time trying to figure out where to cut the paper after deleting the outlines so I had to make a line just a bit further out for where I needed to cut in order to cut them in the right places, so hopefully that will help. I have no idea how everyone got their templates to fit the size requirement without cutting out a ton of stuff, so if anyone has any questions or needs any advice feel free to ask, since I had to delete some of the backgrounds to get it to fit to be uploaded. I know I would not have remained sane/finished mine without all the help from the wonderful ladies on this site!! So thank you so much to everyone who helped!! *Passport Template.ppt
-
Yea, I ended up paying to see the posts. I had asked my fiancé if he would help make posts and when he found it he could pay and not have to make any posts he was ok with that LOL I actually had the idea for the message in the bottle basically right after we got engaged I think I saw in some magazine it being used as favors for the wedding and was like thats a good idea for actual invitations! I soon realized I would have to include way more info then just the invite and didn't want it to be just a sheet of paper thats when I came across this site and the passport invitations which was a lifesaver! I don't think I would have been able to make them without all the wonderful ladies on here who offered advice and templates! I definitely would say enlist people to help I thought I could do it on my own but in the end had to get people to help especially with the making of boxes and gluing and those things. I just didn't realize how much work would go into making them even little things like printing and cutting the paper and all of that. I would recommend a good paper cutter for the passports it makes the cutting go by A LOT faster so its worth the extra $10 to get a better one. If you need any more help or advice feel free to ask! Good Luck!! Thank you! I don't think I would have been able to make them without everyone on this site who was so helpful with their advice and posting templates! I would recommend getting people to help you with the cutting and putting together. I also recommend getting a good paper cutter, I found it was well worth spending an extra $10 to have one that was really sharp and the paper moved less, maybe its just me but the first paper cutter I got I felt like the lines weren't straight and I tend to be a bit of a perfectionist so I decided I would just need to give in and get a better paper cutter and it was so worth it to not be frustrated and have to go back and straighten cuts. I also did my passports in sort of like an order which made it go by a bit faster since at first I was doing each one, cover, first page and last page, and then the inside and then stapling and this seemed to take to long. So, I then started by printing off the inside sheets and cutting those down, scoring them and rounding the corners on them and did all 100 (I had done the 10 the other way already) I then did the first and last page of the inside of the passport, rounding the corners and scoring them and them and then the same thing with the covers and I used glue dots to attach the first page to the cover so I had all 100 ready to be put together then it was easy to grab the inside part which was already together and just stick it in staple. I'm not sure if that makes sense so let me know if it doesn't cuz I can try to explain another way lol. If you have any more questions or need any more help feel free to ask! Good Luck!
-
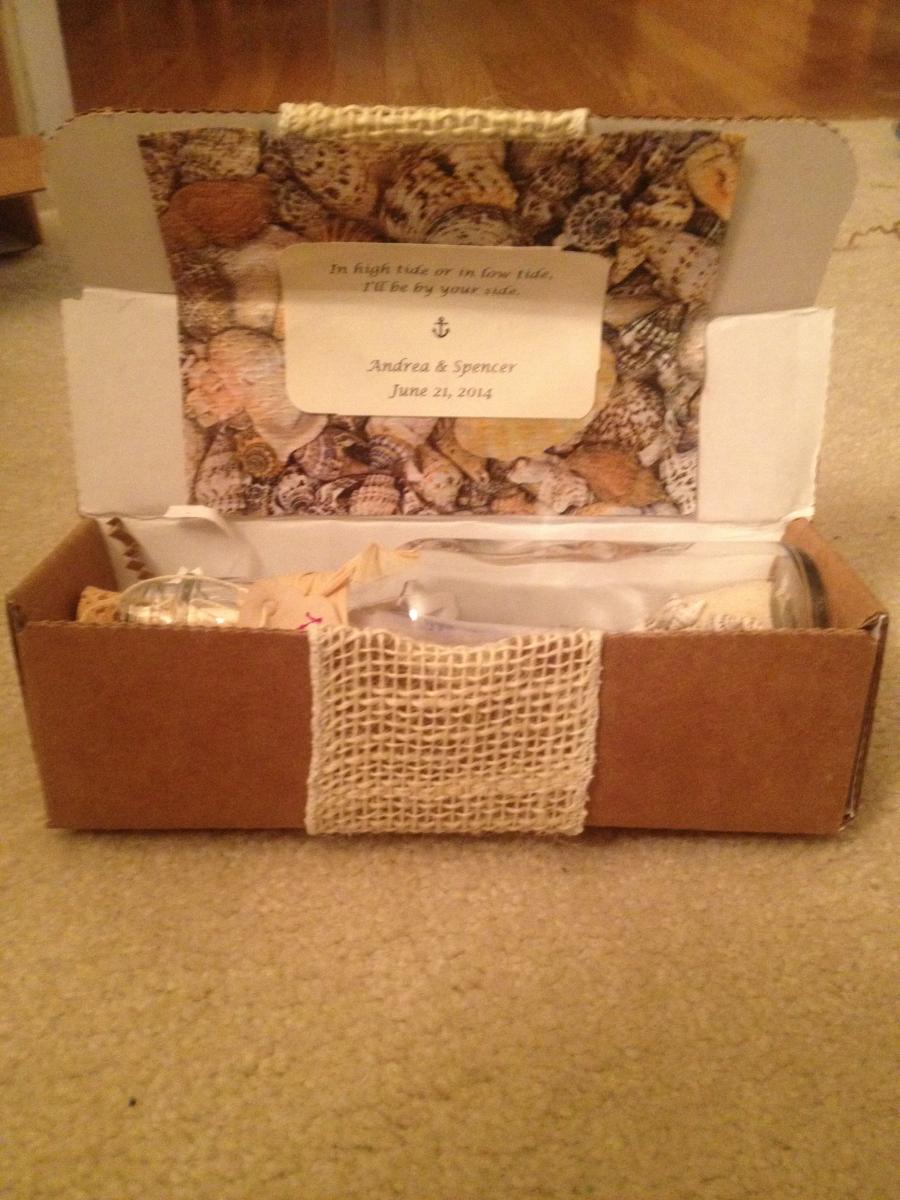
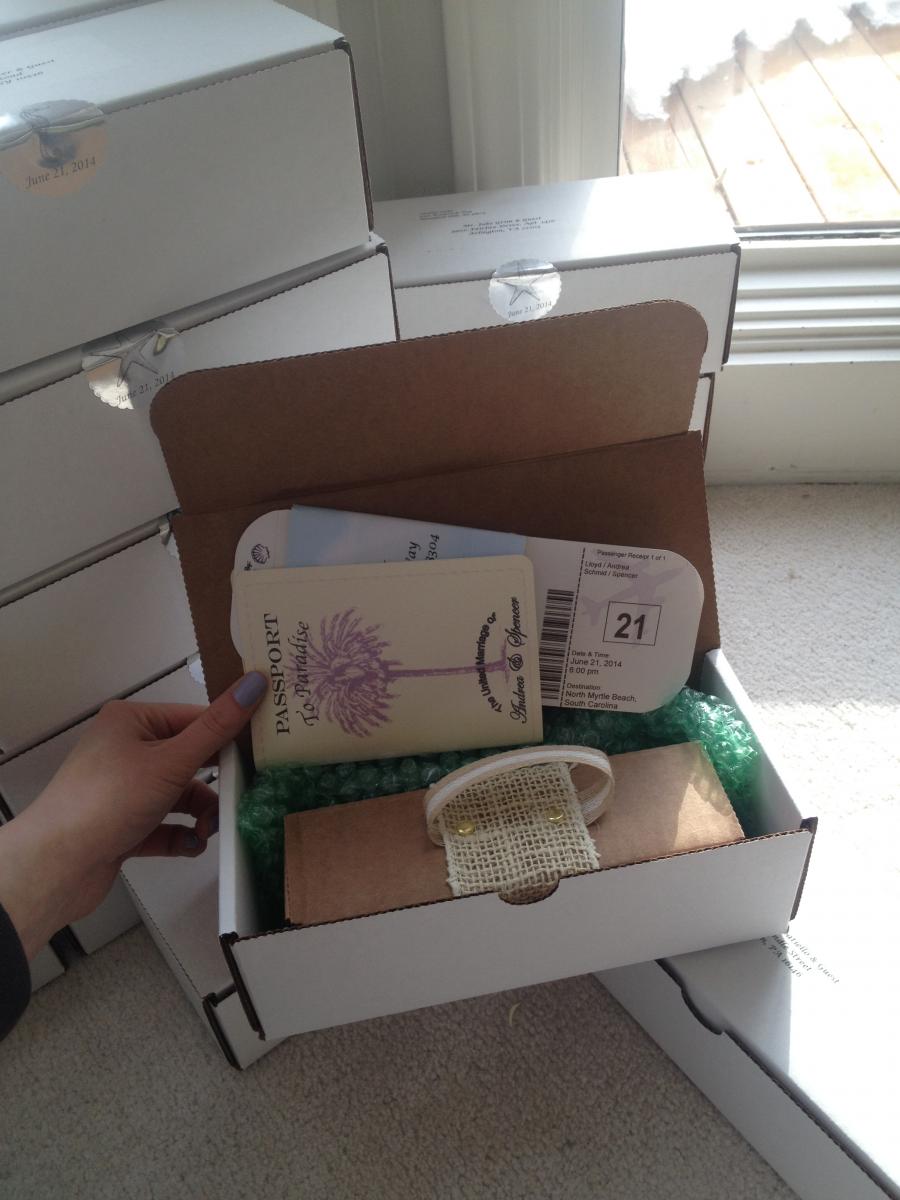
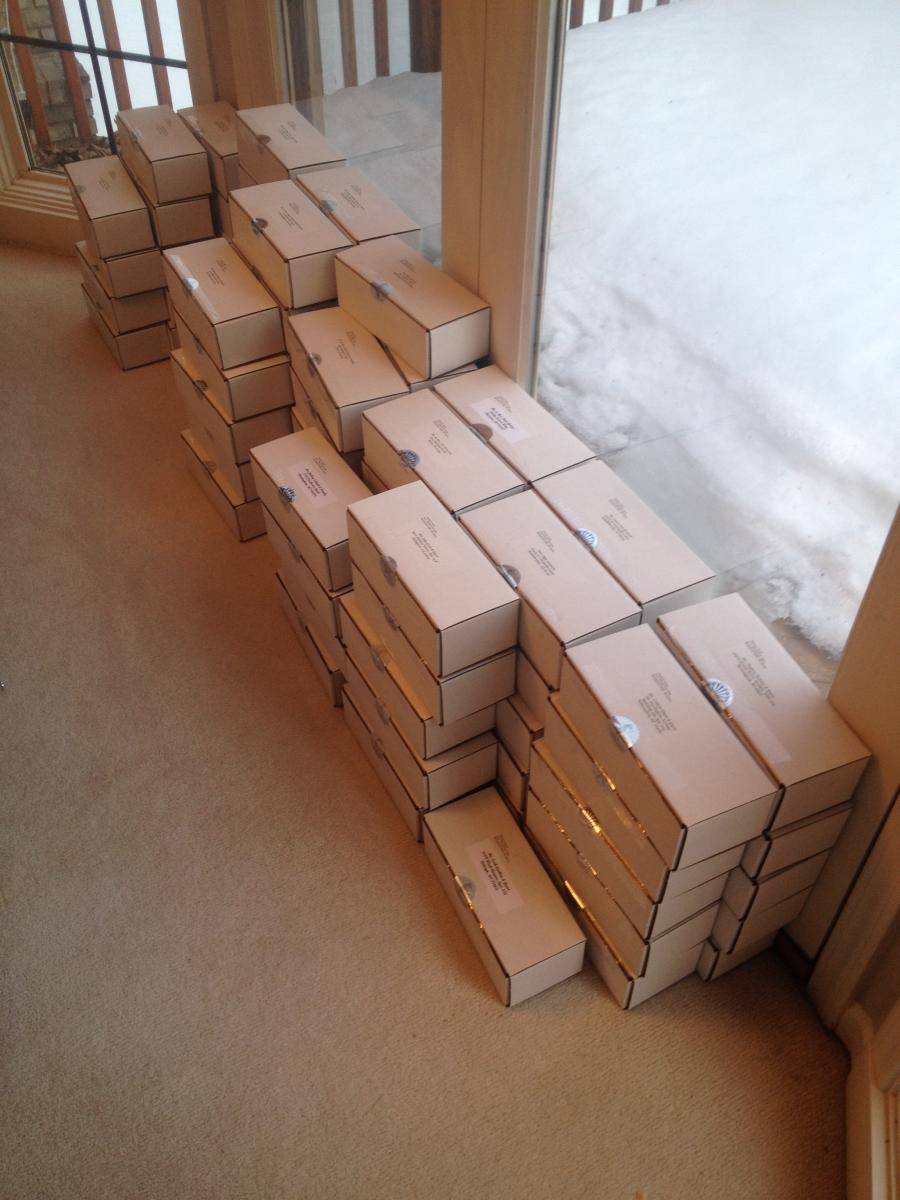
So, I have finally finished my message in a bottle and passport invitation, and it took way longer then I had ever thought it would to finish all 110 invitations, but its a relief to be done! I started with doing the message in the bottle part and putting the boxes together, (which for some reason I had way more difficulty with making the box fold so it was a box then I expected to have). Then I made the passports which were so much more time consuming then I ever expected them to be. I felt like my free time went to doing these constantly but it was so worth it in the end. I added bubble wrap since they were all being shipped to just ensure that they would make it there safely, after all the time I spent on them I think I would cry if any bottles broke during shipping lol. Last I added a decorative sticker that was easy to make with the avery template just with something beach themed (shell, starfish, and seahorse) and then the date of the wedding, to ensure the boxes wouldn't open I added clear shipping tape over the logo sticker (this also helped keep the logo stuck to the box since some were not sticking as well as I had hoped they would) and now they just need to be shipped!!! If anyone is interested I can attach a template for the passports as well, just let me know!

-
When I was thinking of doing this I know I found some just googling antique map and then whatever the place was and then I had planned to just print it off and cut it down to size and use double sided tape to tape it down...but if you weren't looking for a DIY task I know www.magnetstreet.com has some for a good price i don't think they have any map ones but they definitely have a bunch of others for a good price. Good luck!
-
Great job! they look amazing!!
-
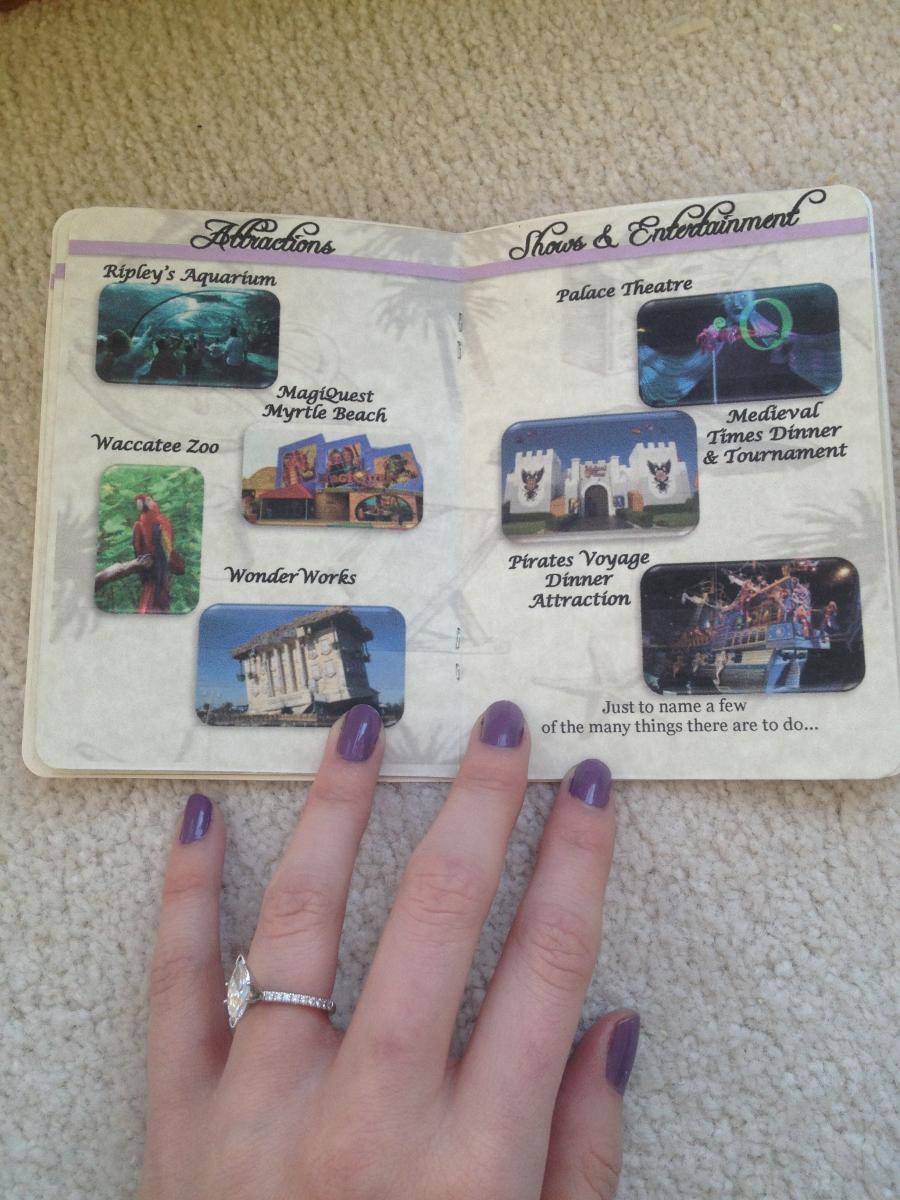
These are great! Thanks for sharing I'm sure your guests will love all the facts and information bits to prepare for their travels. The only thing I would worry about is if they get these 6 weeks before leaving hopefully that gives them enough time in case they need to update or get a passport.
-
hmm thats strange. I have no idea how to make them so everyone can see them. If anyone can help I would gladly fix it them so they can be seen.
-
Thank you! and feel free to snag any ideas!
-
I printed mine back to back but aligning them was a pain and took MANY tries! as for the order i made a black and white copy on just plain computer paper and then folding them till I figured out which pages to print together like my page 2 (The page with the picture so where the invitation part goes) was printed on the right side of the paper and my last page (letter to the guests) was on the left side so when it folded that was in the back. I'm not sure if that makes sense or not if not let me know and i can try to explain better. Good Luck
-
So, even though my wedding is still in the U.S. I fell in love with the passport invitations and figured it was a clever way to get the guests info into the place we were staying and other information about the area since all my guests will be traveling for the wedding still. When I mentally decided on doing the message in a bottle and passport invitations I didn't realize how much my guest list would grow. So 115 message in a bottles later, I nearly gave up on the passport idea but couldn't bring myself to give up on the idea. I still have over half of the passports to finish but I figured I was far enough along in the process that I would share some pics. I don't think I would have been able to do it if it wasn't for this website. The quality of the shimmer of the paper doesn't show up in the pictures. If anyone has any questions feel free to ask!
-
Great job!! They turned out amazing!!! I also did the message in the bottle so I know how much time and effort goes into making them.
-
Was there a meaning behind your wedding date?
ajlloyd15 replied to Mandy1021's topic in Wedding Etiquette, Traditions, to dos
Some of these stories are great. I knew I wanted a June wedding and my FI was ok with that (he's pretty easy going when it comes to any of the planning lol). I also knew his youngest sister would be graduating high school so I wanted to pick a time long enough after but not to close to the 4th of July that so it wouldn't be to rushed so I picked June 21, 2014. Well after telling some people of the date they all thought it was really cleaver since its the first day of summer (I had no idea until they had mentioned it) so now its easier to just tell people thats the reason on why we picked June 21 rather then it was just a convenient day lol. -
There are options as to bring the photo forward or send it back under format picture. I found it was easier at least for me to work in powerpoint so I'm not sure you have the ability to do that but I made my first draft and word and then saw other people on here talking about powerpoint so I tried that and it saved me hours of frustration.
-
I found out that once I was able to see the templates it wasn't that hard to put them together they print 3 per page and from there it was just picking the paper that you want which I got mine on sale at Michaels for 50% off so it was like $7 for a pack of 100 sheets and I printed them at home I also bought a paper cutter and corner punch both were also on sale so they didn't cost that much either. Good Luck!